This tutorial will show you how to export a Revit file to SketchUp. There are two methods for transferring a model. The first is by using a plugin, and the second is by exporting to a DWG file, then importing into SketchUp. Both methods have their pros and cons. Using the plugin, the model retains it’s original materials, but editability is sacrificed. Exporting to DWG retains maximum editability while no materials are preserved. Two case studies are used to demonstrate the capability of both methods, and a comparison of geometry complexity and file size are included at the end of this tutorial.
Software Required: Revit, SketchUp Pro, SimLab SKP Exporter (Revit Plugin), RVT2SKP (Revit Plugin)
Time Required: 5 Minutes
Difficulty: Easy
Tip: You must be in a 3D view to export with either method. If there are model components (topo contours) or overlays (DWG files) that you don’t want in the SketchUp file, turn them off before exporting. The section box should be used to exclude any part of the building or topography that you don’t want.
Method 1 – Revit Plugin: SimLab SKP Exporter

Plugin Details: Single ($99) or floating license ($299) available.
After installation, the plugin is available in the add-ins menu inside Revit.
Control
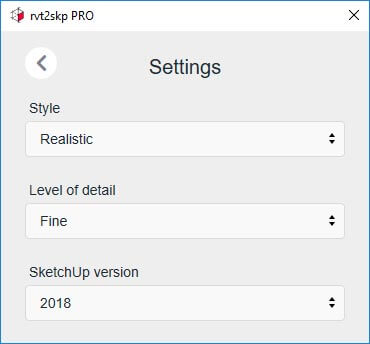
Detail level of the model is controlled by the setting in the 3D view (course, medium & fine). The model is always exported with textures, and can be changed to shaded, hidden line or wireframe using the view styles in SketchUp. Additional alterations made to textures, such as transparency, stain or tint are not carried over, as these features are not built-in to SketchUp. Model location is also not transferred in the export. The SketchUp file is saved as version 8, to retain maximum compatibility.


Left: Model in Revit, Right: Model in SketchUp, using SimLab SKP Exporter
Method 1 – Revit Plugin: SKP2RVT Plugin

Plugin Details: Single ($99 / year) available.
After installation, the plugin is available in the add-ins menu inside Revit.
Control
Visual style, detail level and SketchUp file version is controlled by the exporter settings menu. Model appearance and geometry is identical to the previously mentioned plugin, while location and sun settings are preserved.
Method 2 – Export to DWG
Details: Uses Revit’s built-in DWG export feature.
Step 1
From the file menu, go to export > options > exports setups dwg/dxf.
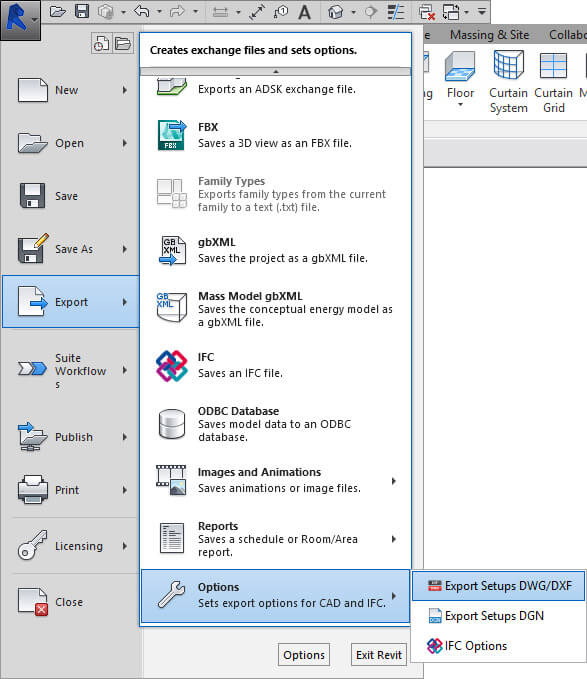
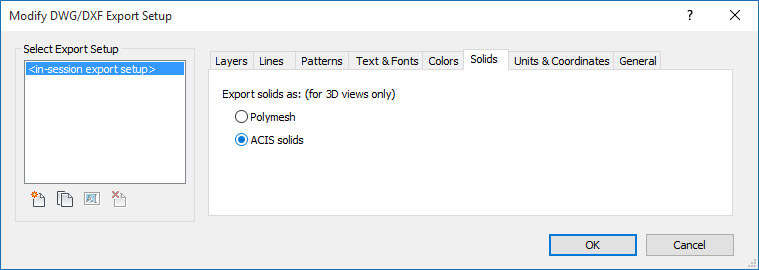
Click on the solids tab, and select ACIS solids.
Step 3
Hit OK, and return to the export menu > CAD formats > DWG. Make sure you are in the 3D orthographic view when you export the model.
Step 4
Import the model into SketchUp Pro. Here is what the Revit 2019 example house looks like after the import.


Left: Raw geometry imported into SketchUp, Right: Geometry after the topography has been smoothed.
Tip: In most cases, all geometry should reside on layer 0 (read SketchUp Layers: Part One – The Sacred Layer0 to find out why). Use the Geometry to Layer0 command in the CleanUp3 plugin for SketchUp to automate this task.
[wp_ad_camp_1]
Plugin Vs. DWG Comparison
As mentioned above, there is a trade off between materials and editability when deciding on which method to use. The geometry exported using the two plugins above is triangulated, and faces that share a common edge in Revit result in two edges that are very close together in SketchUp. A box that normally has 6 faces and 12 edges will have 12 faces and 30 edges. This causes a large increase in the number of edges and faces, and geometry cannot be pushed and pulled, as neighboring faces are not joined. A downside to the DWG export is that subregions in topography are not separated from each other, which makes applying materials time consuming. If the topo surface is left white, all of the lines that form the surface, including the subregions, are hidden, which means that any roads, sidewalks or other areas will not be visible in SketchUp. To create an ideal model with readable topography and editable buildings, export any toposurfaces out using the plugins above, while using the DWG export method for any buildings that should remain editable. Statistics for two case study files are presented below.
Model Statistics for the Revit 2019 Example House
| Export Method | Detail Level | Edges | % Change | Faces | % Change | File Size (MB) | % Change | Layers | Materials |
|---|---|---|---|---|---|---|---|---|---|
| DWG Export | Course | 301,669 | 150,948 | 17.1 | 31 | 1 | |||
| DWG Export | Fine | 328,297 | 9% | 162,825 | 8% | 18.1 | 6% | 30 | 1 |
| Plugin Export | Course | 441,948 | 47% | 216,857 | 44% | 37.2 | 118% | 1 | 63 |
| Plugin Export | Fine | 520,267 | 73% | 242,700 | 61% | 33.3 | 33% | 1 | 65 |
The image to the left shows edges and faces of the exported DWG file in SketchUp, while the right image is the file generated from the plugins.


Model Statistics for a 195 Acre Campus with Buildings
Note: Course and fine detail level produced the same results, as only topography and generic models were exported.
| Export Method | Detail Level | Edges | % Change | Faces | % Change | File Size (MB) | % Change | Layers | Materials |
|---|---|---|---|---|---|---|---|---|---|
| DWG Export | Course | 459,369 | 278,673 | 52.9 | 10 | 3 | |||
| Plugin Export | Course | 904,326 | 97% | 495,921 | 78% | 97.6 | 84% | 1 | 15 |