I am currently developing a series of steel connections for glulam columns and beams. This page will be updated as more become available.
All components on this page were made in Revit 2018.
Knife Plate Connector

Knife Plate Connector: Configurations
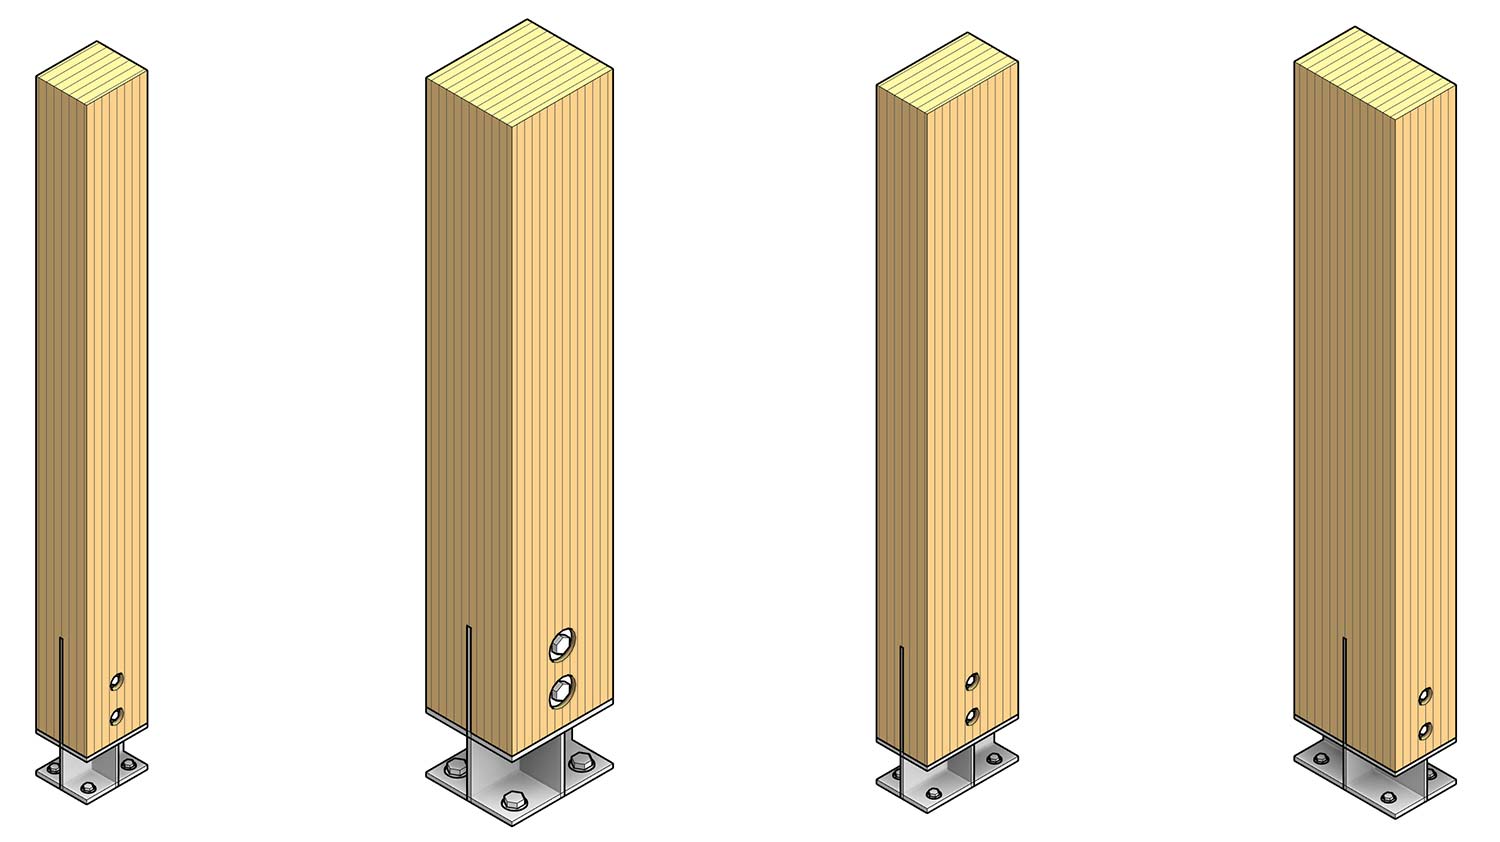
Knife Plate Connector: Column Sizes Variations

Knife Plate Parameter Guide
The knife plate connector is to be used at the top or bottom of a wood column. Two downloads are available. One with the stand-alone connector, and one with it attached to the bottom of a glulam column. The glulam column with integrated knife plate is easier to use, but if you wish to place the knife plate on the top of the column, or use in a different column family, the knife plate family file should be used instead. All parameters are shared, so they can be used in schedules. The detail of the model has to be medium for the plates to appear, and fine for the bolts to appear.
See the image to the right to see how to adjust the parameters, and usage below on aligning the connector to a column.
Download Knife Plate Family
Download Glulam Column Family with Integrated Knife Plate
Usage – Knife Plate Family

- Place connector on the bottom of the column.
- Switch to an elevation or section view, and mirror the connector across the bottom surface of the column.
- In plan, switch to wireframe view, and use the align tool to align the center of the connector with the center of the column. Make sure to do this in both axes, so the connector moves with the column.
- The connector and column should appear like this.
- Using the cut tool, click the column first, then the connector.
Stirrup Bracket

Stirrup Bracket: Configurations
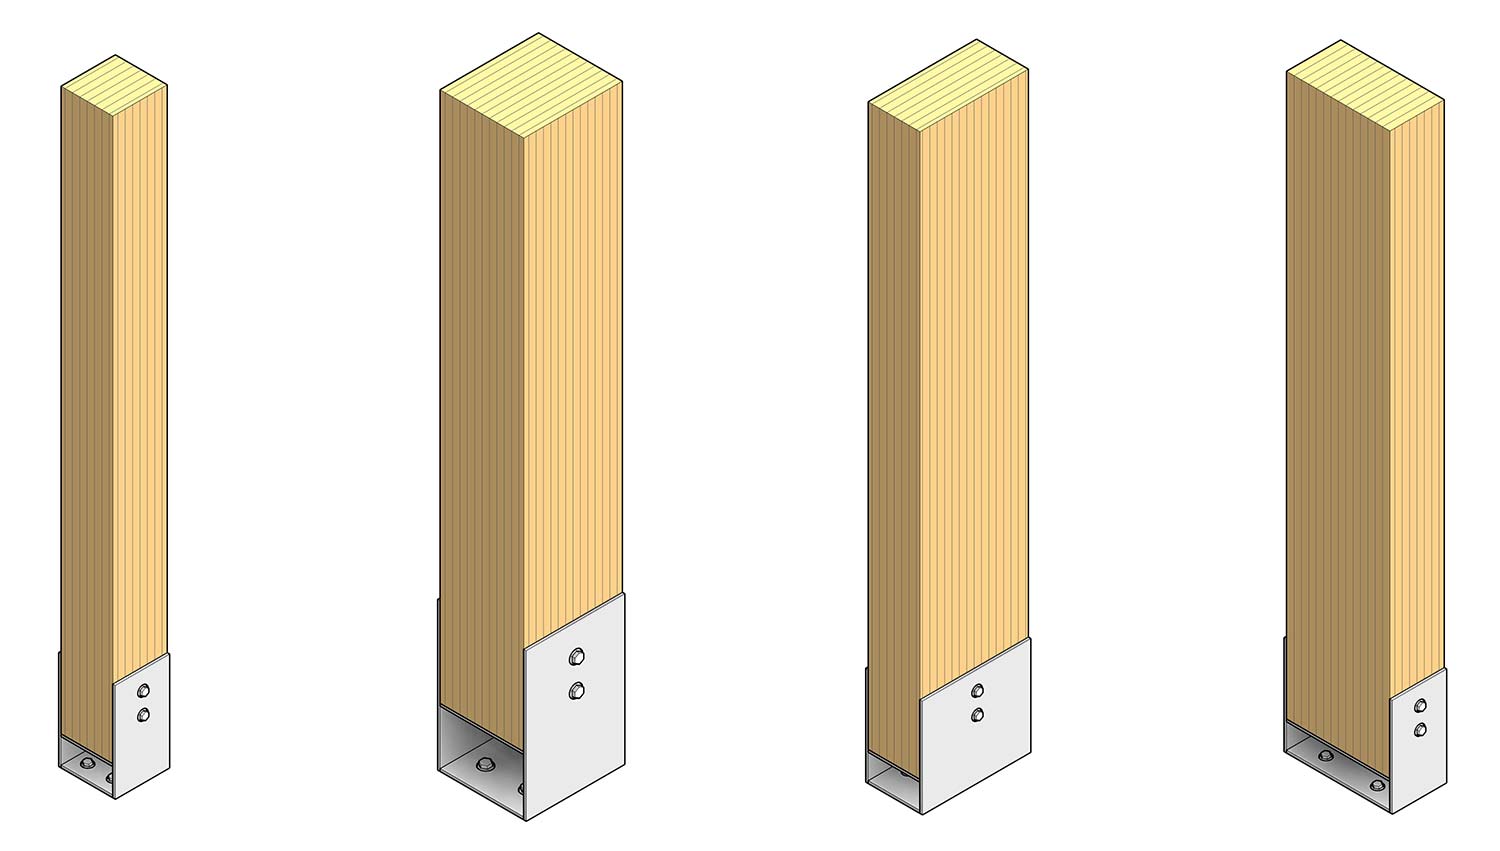
Stirrup Bracket: Column Size Variations

Stirrup Bracket Parameter Guide
The Stirrup Bracket is to be used at the top or bottom of a wood column. Two downloads are available. One with the stand-alone connector, and one with it attached to the bottom of a glulam column. The glulam column with integrated stirrup bracket is easier to use, but if you wish to place the bracket on the top of the column, or use in a different column family, the stirrup bracket family file should be used instead. All parameters are shared, so they can be used in schedules. The detail of the model has to be medium for the plates to appear, and fine for the bolts to appear.
See the image to the right to see how to adjust the parameters, and usage below on aligning the connector to a column.
Download Stirrup Bracket Family
Download Glulam Column with Integrated Stirrup Bracket
Usage – Stirrup Bracket Family

Bucket Bracket

Bucket Bracket: Option Variations

Bucket Bracket: Size Variations

Bucket Bracket Parameter Guide
The bucket bracket is to be used at the ends of a wood beam. Two downloads are available, one with the stand-alone connector, and one with it attached to the ends of a glulam beam. The glulam beam with integrated bucket bracket is easier to use, but if you wish to use different parameter settings for each side, or want to use the bracket on a different beam family, use the standalone bracket family file. All parameters are shared, so they can be used in schedules. The detail of the model has to be medium for the plates to appear, and fine for the bolts to appear.
Download Bucket Bracket Family
Download Glulam Beam with Integrated Bucket Bracket
Download Bucket Bracket Illustrative Guide
Parametric Hex Bolt Head, Thread and Nut

Left to right: bolt head, bolt head with large washer, thread and nut, and thread and nut with large washer.
The following bolt families are used in the steel connectors above. The geometry is simplified, so there is no chamfering on the bolt head, nut, or threads on the bolt shaft. The size of the bolt components is driven by the bolt diameter. The resulting sizes closely follow standard U.S. bolt sizes (1/4″ – 3″). All parameters are shared, so they can appear in schedules.
They are face-based families, and the detail level in Revit must be set to fine for them to appear.
Download Parametric Bolt Families
[wp_ad_camp_2]